
How To Merge and Split Rows in a CSV File - Rons Data Edit
A CSV Editor is the ideal application to merge or split rows in a CSV file; you can download Rons Data Edit, for free, right here: Download.
You can open your CSV file by selecting Open Document from the File menu or by clicking Open Document on the application's Start Page.
Merging Rows in a CSV File
1. Open the Row Tools Panel
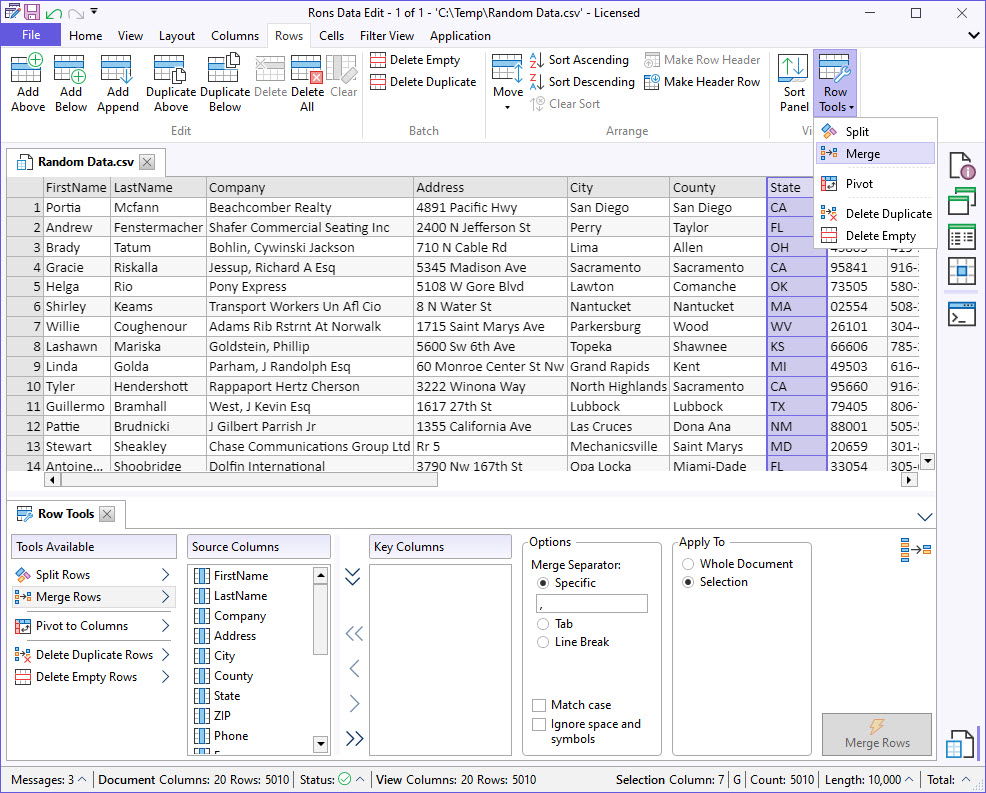
Open the Row Tools Panel from the Row menu. Once the panel open, select Merge Rows from the available tools displayed.
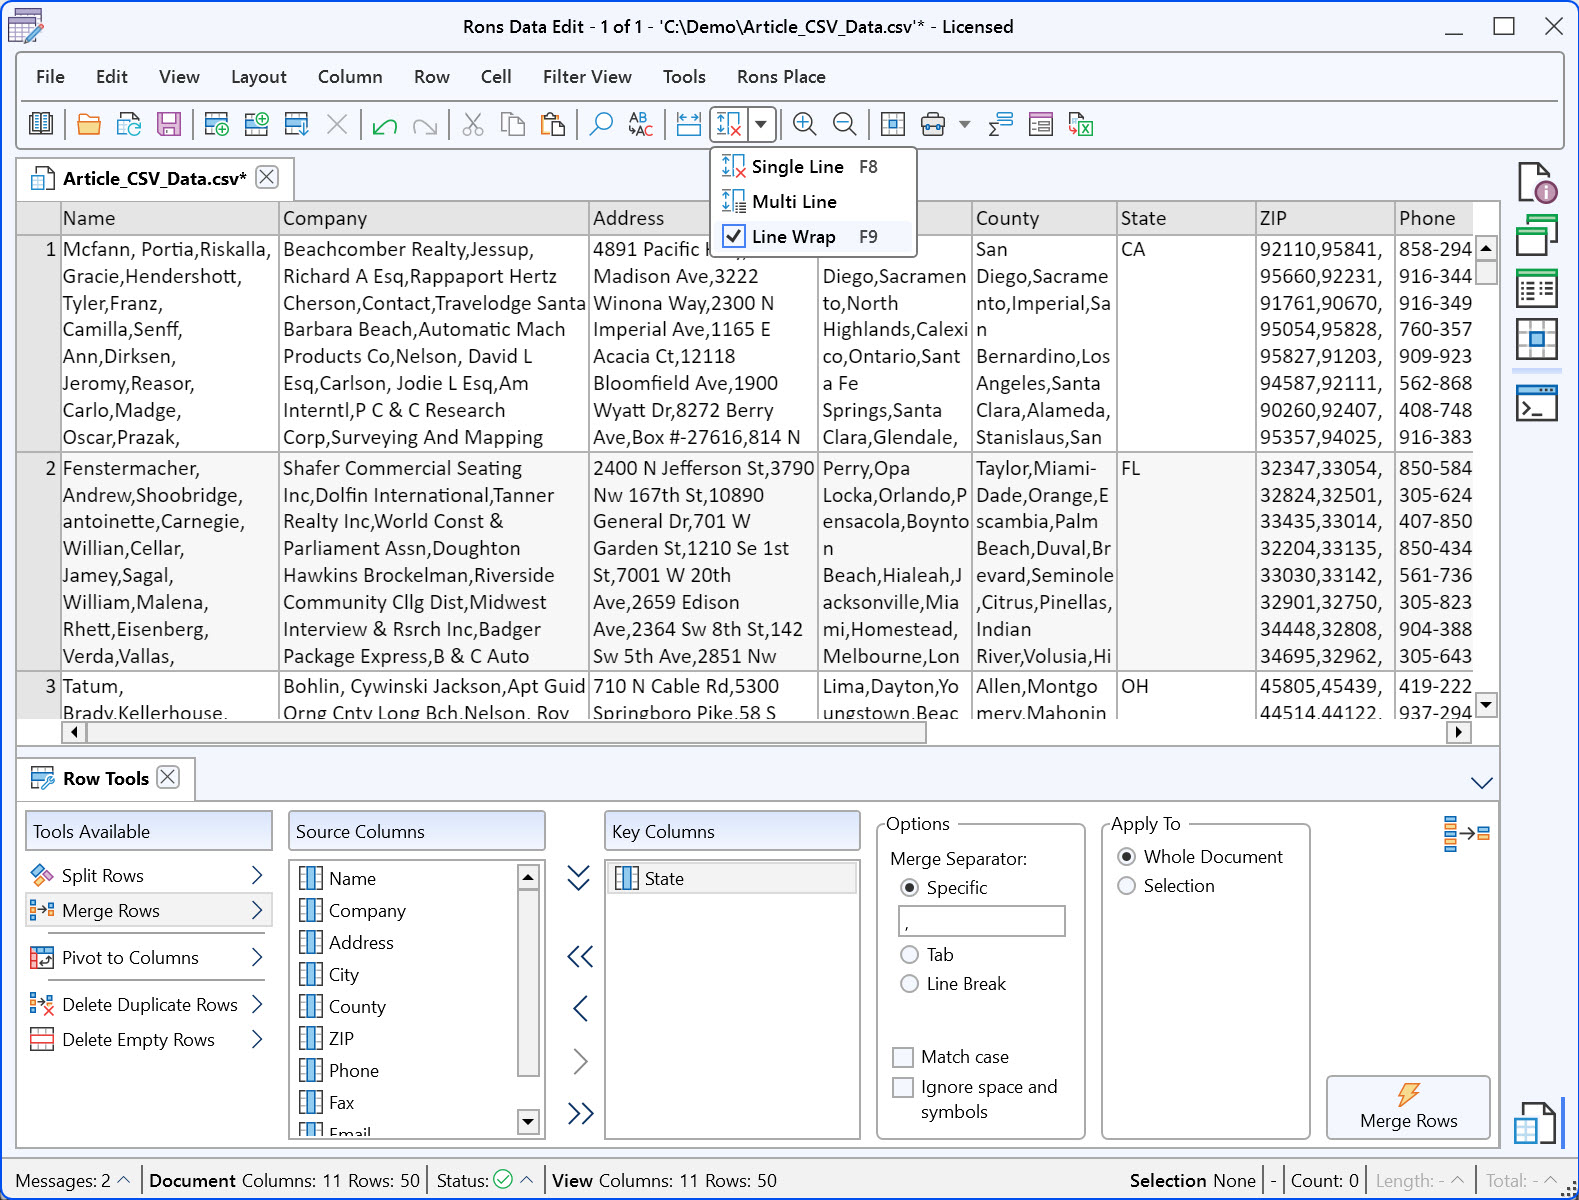
2. Set the appropriate 'Merge Rows' options
See below for the listing of the settings and their explanation.
|
Description |
Options |
Explanation |
| Tools Available | Several tools are displayed. 'Merge Rows' should be selected. | |
| Source Columns | In the 'Source Colums' section all the columns of the document are listed and can be selected and transfered by clicking on the arrows to the next section ('Selected Columns'). | |
| Selected Columns |
The 'Selected Columns' section displays the columns that are going to be merged together. The two Up and Down arrows on the left side allow to move the columns and give accordingly the proper merging order of the data. |
|
| Options | ||
|
Merge Separator |
Specific |
If checked the cell text for any rows merged will be separated by the text in the text box below (for example a comma, a space, a dash etc.). |
| Tab |
If checked the cell text for any rows merged will be separated by a Tab. |
|
| Line Break |
If checked the cell text for any rows merged will be separated by a line break. Note: that under the 'Single Line' viewing mode only one line will be displayed but the blue font colour indicates that there are more lines in the cell. To be able to see all the lines change the View mode to 'Multi Line' under the Layout menu. |
|
| Apply to | ||
|
Whole Document |
Changes will be applied to the entirety of the current document. |
|
|
Selection |
Changes will be applied to the selected cells in the current document. |
|
| Match Case | If checked the case of the text will be used when comparing rows, otherwise case will be ignored. | |
| Ignore space and symbols | If checked non-text characters will be ignored when comparing rows. | |
In the example above, the user wants to merge rows to group the data by state. The objective is to consolidate the data so that each state is represented by a single row.
To accomplish this, the State column has been selected in the Source Columns section and moved to the Selected Columns section using the > arrow button. In this example, a comma (in Specific) has been chosen as the Merge Separator, and the operation has been configured to apply to the Whole Document.
Note: Rows containing multiple lines are displayed in blue text. To view all lines within a cell, switch the display mode to Multi Line from the Layout menu.
3. Apply the changes
Click the Merge Rows button to apply the changes.
Once you are satisfied with the results, save the document by clicking Save in the top-left corner of the main window or by selecting Save from the File menu.
Note: Any action can be easily reversed by clicking the Undo button in the top-left corner of the main window.
Splitting Rows in a CSV File
1. Open the Toolbox and go to the 'Split Rows' Tool
Your CSV file can be opened using the 'Open Document' File menu, or 'Open Document' link on the Start Page of the application.
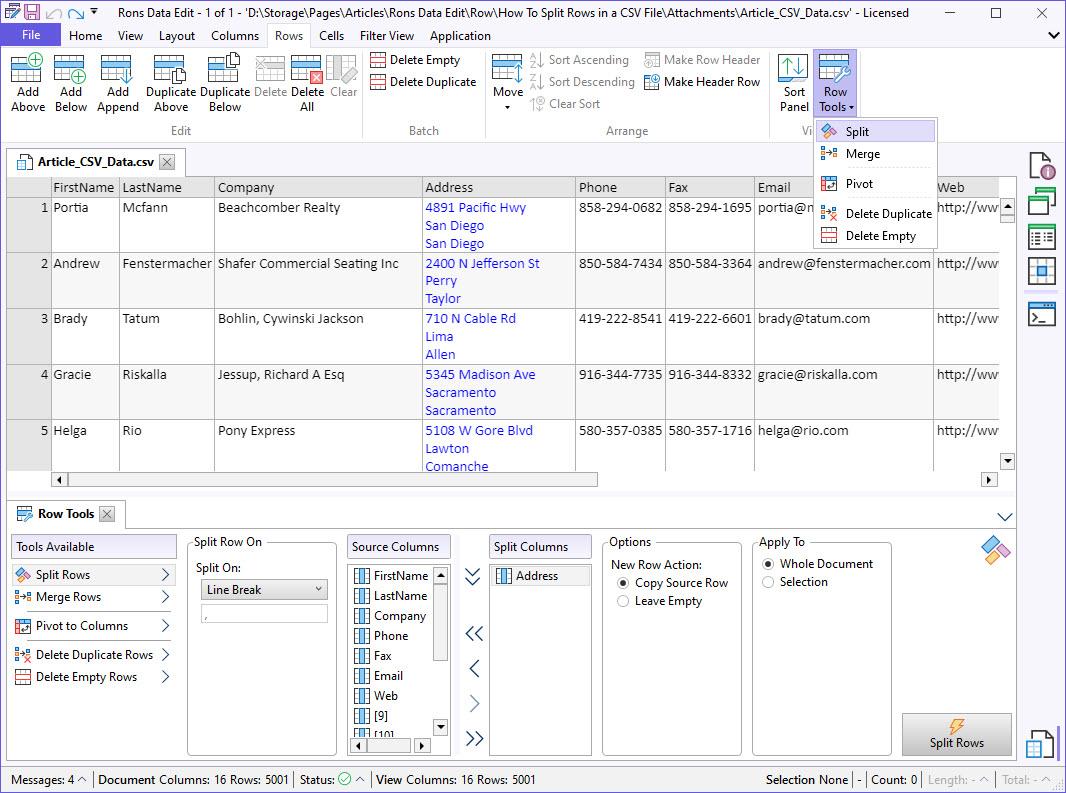
In the main menu, go to the Rows menu, and click on the Row Tools \ Row Tools Panel menu. This action opens the Row Tools panel. From the available tools displayed, select Split Rows.
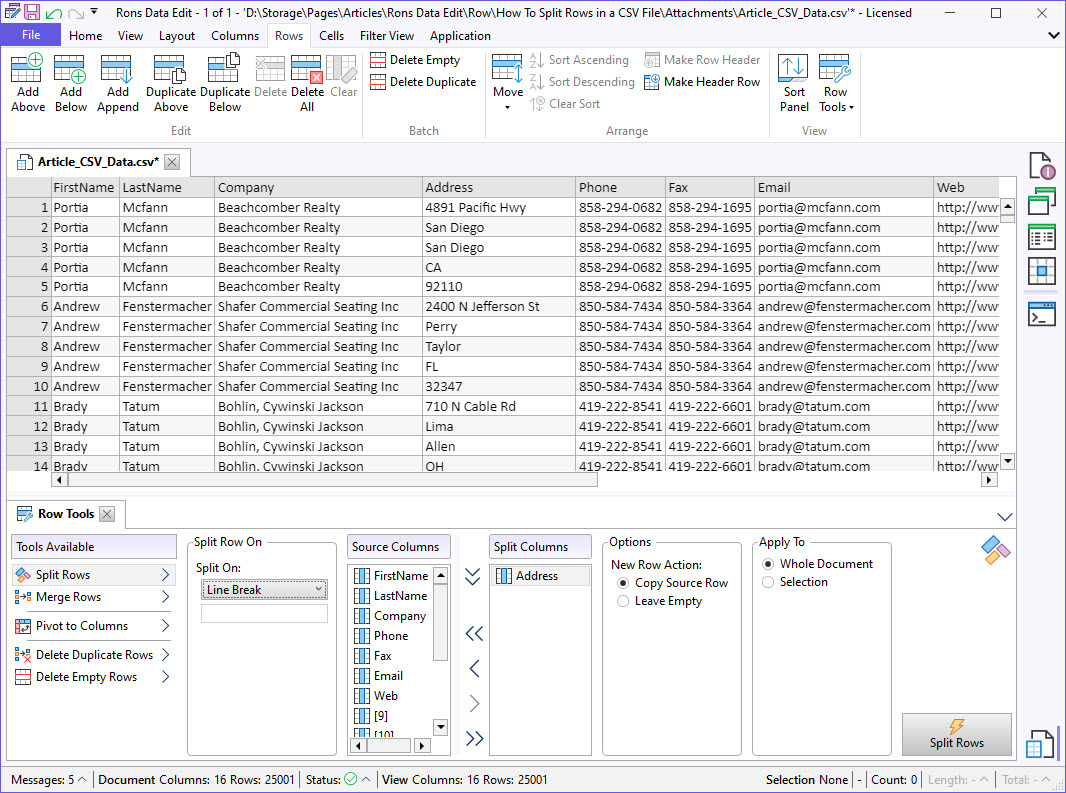
2. Set the appropriate 'Split Rows' options
See below for the listing of the settings and their explanation.
|
Description |
Options |
Explanation |
| Tools Available | Several tools are displayed. 'Split Rows' should be selected. | |
| Split Row on | ||
| Split Column | Column List | Select the column where the splitting of the data will result into the creation of a new row. |
| Split on | Text | When selected, the text can be typed in the dedicated field below. As a consequence the row(s) will be split at the level of the typed in text when detected. That text won't be included in the new row(s). |
| Regular Expression | When selected, the regular expression can be typed in the dedicated field below and it will determine the area where the split will occur. | |
| Tab | When selected, the row(s) will be split at the level of Tab separations. | |
| Line Break | When selected, the row(s) will be split at the level of Line Break separations. | |
| Options | ||
| New Row Action |
Copy Source Row |
When checked the content of the source row will be copied. |
| Leave Empty | When checked the content of the source row won't be copied so the cells will be empty. | |
| Apply to | ||
|
Whole Document |
Changes will be applied to the entirety of the current document. |
|
|
Selection |
Changes will be applied to the selected cells in the current document. |
|
In the example above (see pictures), the user wants to split rows based on the information in the Name column. The goal is to create a new row for each value contained in the Name column (in this case, the last name and first name), which are separated by a comma, while keeping all other data from the original row unchanged.
To achieve this, the Name column is selected as the source column, the row is split on the Comma delimiter, and Copy Source Row is enabled so that all other column values are copied to the newly created rows. Finally, the operation is applied to the Whole Document.
3. Apply the changes
Click the 'Split Rows' button to apply the changes.
When satisfied with the changes, make sure to save the document by clicking on the 'Save' button the top left corner of the main window or by clicking the 'Save' menu in the 'File' menu.
Finally
If you have a question, send us a message, or visit the Rons Place Software Website to learn more about Rons Data Edit.
Related Information
- A Perfect Excel alternative to handle CSV files
- How to open and view a CSV file
- Rons Data Edit for e-Commerce
- Text Encoding and Languages in CSV Files
- What is a CSV File
- What is the best CSV Editor
- What is the Difference between Rons Data Edit and Rons Data Stream
CSV Editing
Rons Data Edit


