What is Rons WebLynx? How does it work? What are its key features? In this guide, we answer these questions to help you get started with Rons WebLynx, your secure, desktop bookmark manager for Windows. We’ll introduce the most important features here, with links to dedicated articles for those that warrant a deeper dive.
1. A Brief Introduction
Rons WebLynx is a powerful bookmark manager for Windows that runs directly on your desktop. Being independent of your browser and the cloud, it provides a more secure and private environment for managing your bookmarks. With the ability to store and organize thousands of links in a familiar tree layout, Rons WebLynx makes it easy to sort, categorize, and quickly access your favorite websites.
Key features include:
- Robust Folder Organization: Easily sort bookmarks into folders and sub-folders.
- Secure Storage: Keep your links private and off the cloud.
- Built-In Tools: Use the built-in WebLynx extension, taskbar tray functionality, and RSS feed reader to effortlessly import URLs.
Discover how Rons WebLynx can simplify your online life by reading on.
2. Opening a WebLynx File
When you first download Rons WebLynx, here’s what to expect:
- Lite Mode Limitations: Without a Pro license, you can save up to 500 links and an advertising banner will be displayed.
- 15-Day Pro Trial: Activate the 15-day Pro trial from the application’s Start Page to remove these limitations and the banner. Note that the trial can only be activated once; after 15 days, the app will revert to the lite version.
Rons WebLynx is file-based, allowing you to create separate files for different areas of interest. You can even have multiple files open at once for flexible usage. Bookmark files are saved with the .linker extension and are accessible both within Rons WebLynx and through File Explorer.
2.1 Opening a File for the First Time
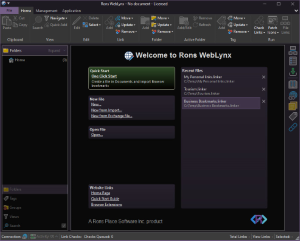
For a quick start, choose the One-Click Start option. This creates a new bookmark file automatically in your "My Documents" folder, imports your web browser’s bookmarks, and sets up a few sample folders to help you get going.
2.2 Opening a File the Standard Way
To manually create a new file, simply click on New... on the Start Page. Enter a name for your file, select a location, and click Save. Your new file will open in Rons WebLynx. On the left side, you’ll see some example folders (some even containing sample links from our website) that you can use as inspiration or delete, as you prefer.
2.3 Opening a File by Importing
Rons WebLynx lets you create a new file by importing links from various sources, such as:
- The Clipboard (contents you’ve just copied)
- A Web page
- Local files or directories
- Outlook folders or other web browsers
Just click on New from Import... and choose the source from which you’d like to import your links.
2.4 Creating a File with a WebLynx Exchange File
If you have a WebLynx Exchange file, you can import it by selecting New from Exchange File.... These files, saved with a .lnkxch extension, include your links along with their folders, tags, and notes. They’re perfect for backing up your bookmarks, sharing a curated list with others, or moving links between different WebLynx files without transferring the entire file.
2.5 Opening Recent Files
Every file you create or open automatically appears in the Recent Files section on the Start Page. This feature makes it easy to quickly access your most-used bookmark files the next time you launch Rons WebLynx.
3. Getting Links into WebLynx in your open File
Adding links to your open Rons WebLynx file is simple and flexible. Newly added links always appear highlighted in green so you can easily distinguish recent additions from older ones—the darker the green, the newer the link. Over time, the green highlight fades away.
3.1 Copy & Paste, Drag & Drop
-
Copy & Paste:
Simply copy your links and paste them into any open folder view or tag view in the middle section. Feel free to copy a whole web page: the software will automatically extract every link it can detect and ignore the rest. -
Drag & Drop:
You can also drag and drop links directly into WebLynx. Try dragging a Word document—the program will scan and extract all URLs found inside.
For more detailed information on extracting hyperlinks from documents, check out the following article: How to Extract Hyperlinks from a Word Document.
3.2 Add
-
Using the Add Function:
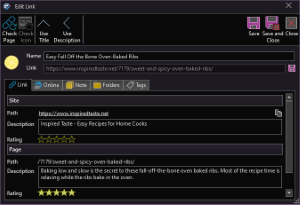
Select a folder, then click in the middle section to activate the Add option in the top Folder Menu. A dedicated window will open where you can either type a new URL or paste one in. Once recognized, you can then edit the link details, such as the name, additional site or page information, notes, tags, and folder assignments.
3.3 Quick Add
-
Quick Add Feature:
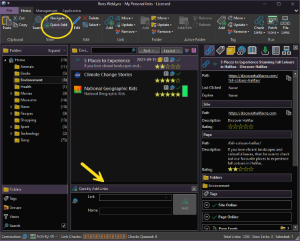
Access Quick Add from the top ribbon in the View section. This opens a window beneath the middle section where you can quickly type in a URL to add it to your bookmarks.
Note that Quick Add does not include the full editing options available in the standard Add mode.
3.4 Import...
-
Importing Bookmarks:
After you’ve created your Rons WebLynx file, you can use the Import option—found in the Management section of the Top Ribbon—to bring in links from various sources:- Clipboard (recently copied content)
- A web page
- A local file or directory
- An Outlook folder
- Web browsers
- A WebLynx Exchange file
- Additionally, you can import from CSV files or complete websites.
For more in-depth information on importing (and exporting) bookmarks, have a look at our article: Importing and Exporting Bookmarks.
3.5 RSS Feed Reader
- Using RSS for Automatic Updates:
Rons WebLynx also functions as a handy RSS feed reader:
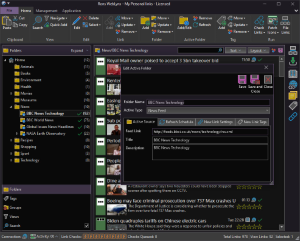
- Create a standard folder and name it, for example, “BBC News Technology.”
- Click Add/Edit in the Active Folder section on the top ribbon.
- In the Active Folder window, change the Active Type from None to News Feed and enter an RSS feed address (e.g., http://feeds.bbci.co.uk/news/business/rss.xml).
- Click Save and Close. The folder icon will change to indicate it’s now an Active Folder, and you’ll see the latest RSS feed articles automatically displayed.
4. The Left Section: Organizing Bookmarks with Folders, Tags, Views & Search
The left section of Rons WebLynx is dedicated to organizing your bookmarks using Folders, Tags, Groups, Views, and Search. This is where you bring structure to your links.
4.1 Folders
-
Folder Structure:
Bookmarks are stored in folders arranged in a familiar tree-style layout—similar to Windows Explorer. You can edit, move, merge, or delete folders using the top ribbon’s Folder options or by right-clicking. Remember, folders can also be converted into Active Folders to automatically receive RSS feed articles.
4.2 Tags
-
Tagging for Better Organization:
Add tags to individual bookmarks as an extra level of organization. For example, you might tag random links dispersed across various folders with the label “Kids” (perhaps highlighted in purple). When you select the Tags View, all bookmarks with the “Kids” tag appear together for easier access.
4.3 Groups
-
Group Organization:
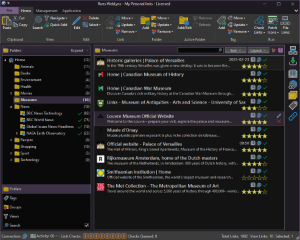
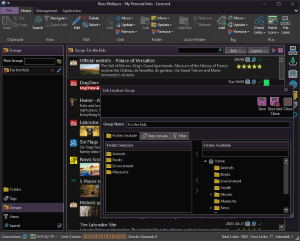
Folders and tags can also be organized into Groups. In the Groups section on the left, you can create new groups. For instance, you might create a “For the Kids” group that includes folders like Animals, Books, Environment, and Museums. Selecting this group gathers and displays all the links from these folders in one view.
4.4 Views
-
Custom Views to Filter Bookmarks: The View section lets you
quickly filter and locate specific bookmarks. You can view:
- Recently added links ("New")
- Bookmarks linked to RSS feeds ("Page with Feed")
- Expired, redirected, or missing links
- Bookmarks stored in multiple folders ("Multiple Folders")
- Bookmarks without folders or tags
- Deleted bookmarks—as a last resort to recover a lost link
For tips on handling duplicate bookmarks, see our article Dealing with Duplicate Bookmarks.
4.5 Search
-
Advanced Search Options:
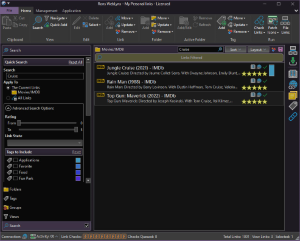
Use the Search section to find URLs by applying keywords. You can choose to search within the current view or across all stored links. Additional filters in the Advanced Search Options let you include or exclude specific tags or filter by the number of stars. -
Global Search Filter:
A checkbox next to the Search function allows the filter to apply across all views. This means you can search within folders and see only the links that match your criteria. A flashing “Links Filtered” message indicates that the filter is active. Simply uncheck the box to remove the filter and see all your bookmarks again.
You can also toggle a quick search panel at the top of the middle section for instant filtering.
5. The Middle Section: Bookmark Display
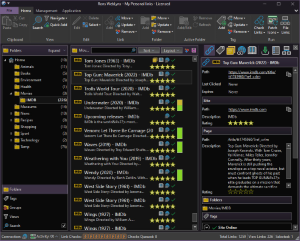
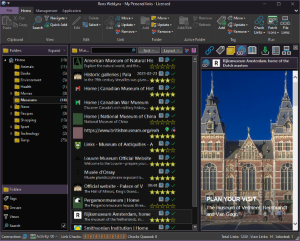
The middle section is where your selected bookmarks are showcased, allowing you to easily view and manage your links from the current view.
-
Flexible Layout Options
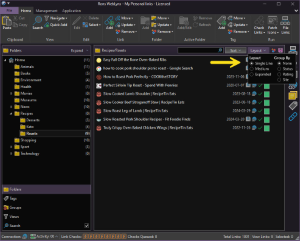
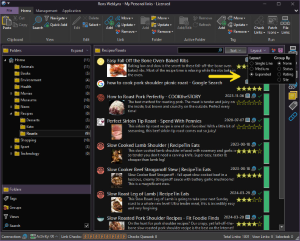
Adjacent to the Quick Search bar, you can sort your bookmarks or change the display layout—choosing between Single Line, Medium, or Extended views. This flexibility lets you either simplify the view for a quick scan or reveal more bookmark details as needed.
-
Instant Access
Click on any bookmark title to immediately open the link in your preferred web browser. -
Editing and Managing Bookmarks
Most of your bookmark details can be managed through the Edit Link window. To access it, select a bookmark and either click on Edit in the ribbon menu or right-click and choose the edit option. Inside the Edit Link window, you can:- Change the bookmark’s name.
- Add or update descriptions at the site or page level.
- Assign star ratings.
- Set a specific browser for opening that link automatically.
- Update or view the site information, add notes, move or duplicate the bookmark into other folders, and add or modify tags.
- Refresh the link or its icon if automatic updates aren’t enabled.
- Integrated Side Panel Functionality
Once you select one or more bookmarks in the middle section, the corresponding details and options will automatically display in the eight side panels, providing additional tools and information to streamline your bookmark management. This intuitive middle section design ensures that your bookmarks are not only easy to access, but also simple to customize and update.
6. The Right Section: The Side Panels
Rons WebLynx packs a powerful set of eight side panels that give you great control over your bookmarks: Link Information, Link Tags, Link Notes, Link Page, Link Content, Quick Links, Landing Zone, and Automatic Filing. Here’s a breakdown of each panel:
6.1 Link Information
The Link Information panel displays key details about the selected bookmark, including:
- Its file path
- RSS feed activity status
- The associated icon and image
- A full link history within Rons WebLynx
6.2 Link Tags
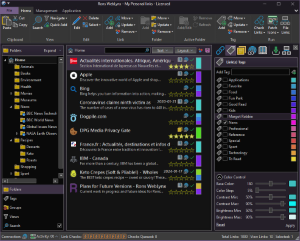
In the Link Tags panel, you can view all tags associated with a bookmark and create new ones. For optimal visual appeal and consistency, open the Color Control feature at the bottom of the page to adjust tag colors until you find a gradient that suits your style.
6.3 Link Notes
Use the Link Notes panel to add regular or secure notes to your bookmarks.
IMPORTANT: Secure Notes require you to set a password. Once set, the password cannot be recovered if lost, so be sure to save it safely.
6.4 Link Page (Browser View)
This panel offers a built-in browser view of the bookmark’s destination site. Note that the Link Page is for viewing only: you cannot interact with or navigate the webpage directly from this panel.
6.5 Link Content (Reading View)
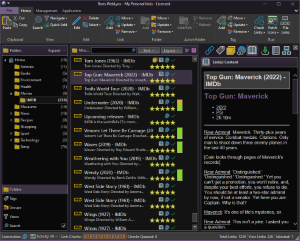
For a clean, distraction-free reading experience, the Link Content panel displays the webpage in a streamlined format without any ads or clutter. This view is ideal if you need to export content, for example, into a Word document.
Please note that the quality of the Reading View depends on the design and structure of the original webpage.
6.6 Landing Zone
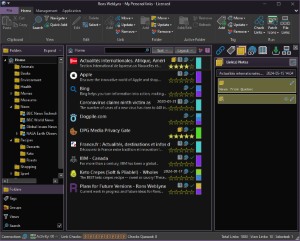
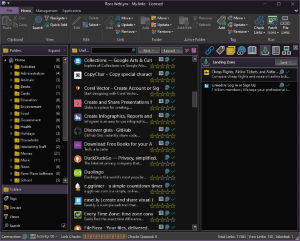
The Landing Zone is a centralized area shared across all your Rons WebLynx files, making it easy to share and manage links. This panel works seamlessly with the Rons WebLynx browser integration to gather links you’ve saved during your internet browsing sessions, even when WebLynx isn’t open, allowing you to organize them later.
- Rons WebLynx Browser Integration
The Rons WebLynx browser integration lets you save links directly from your web browser without interrupting your workflow. After installing the Rons WebLynx extension, any links you decide to keep while browsing will automatically land in the Landing Zone. This means that the next time you open a Rons WebLynx file, you can simply navigate to the Landing Zone to find all your newly saved bookmarks and then move them into your desired folders for organization.
6.7 Quick Links
Quick Links offers you a shortcut to your favorite or most frequently accessed bookmarks.
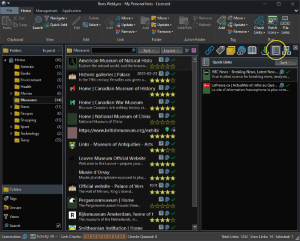
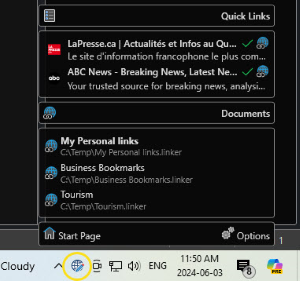
Simply drag your selected links into this panel, and they will appear in the Rons WebLynx tray—displayed at the bottom right of your Windows taskbar. This tray ensures that even when Rons WebLynx is closed, your top bookmarks and recent files remain quickly accessible.
6.8 Automatic Filing
Automatic Filing is a robust feature designed to streamline the organization process. With this panel, you can set up rules and keywords so that bookmarks are automatically moved into appropriate folders, tagged, or even deleted based on your criteria. This feature is especially valuable when managing a large influx of links from various sources such as web pages, search results, or presentations. For detailed guidance on setting up these rules, check out our dedicated article on Automatic Link Filing.
7. WebLynx Options
A final word about the general settings in Rons WebLynx.
If you plan to use
Rons WebLynx regularly or intensively, we strongly recommend taking a closer look
at the settings. Since WebLynx manages a wealth of information that needs regular
refreshing, you might want to control how frequently your links are updated. You
can easily do this in the General Settings under the Application
section in the top menu. This applies both globally across the application and at
the individual file level. You’ll also find the Appearance Settings
in this area, where you can switch between dark and light modes and choose a
color theme that best suits your personal style.
8. Wrapping up
Our goal in this article was to provide you with enough insights to start using and getting the most out of Rons WebLynx. We believe this desktop bookmark manager is both a fun and remarkably useful tool for anyone who works regularly online. We hope you enjoy using it as much as we do. Don’t forget to send us your feedback!
Related Information
Rons WebLynx
